You can use Pair Pro Mail to automatically forward email to another address. Please follow these steps if you want to set up Forwarding in Pair Pro Mail:
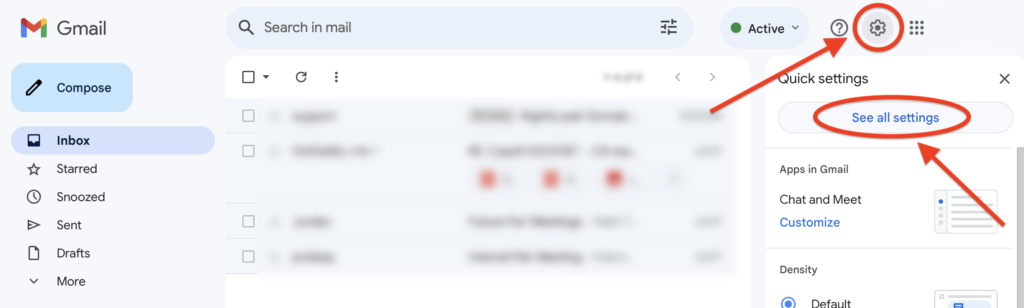
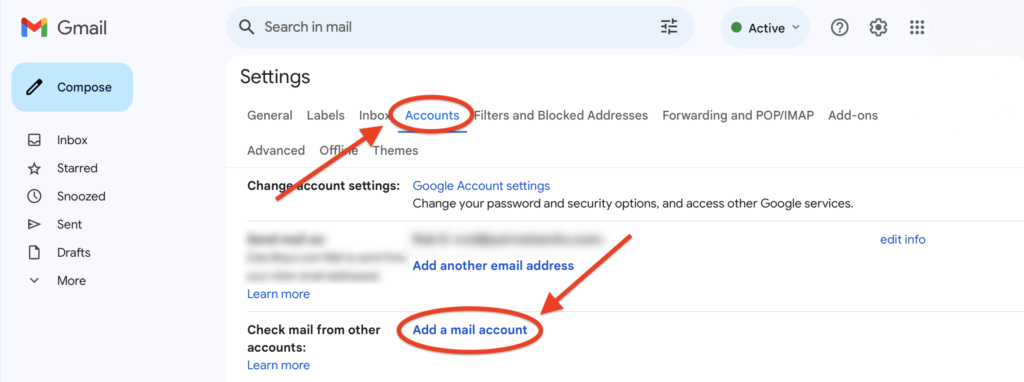
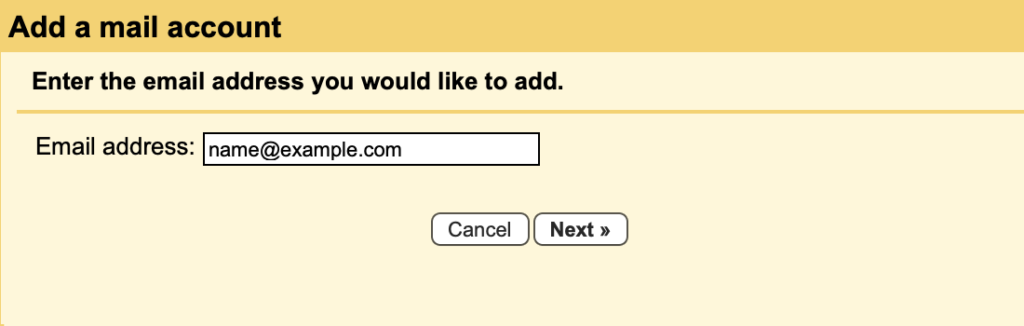
5. Next to Check email from other accounts, click Add a mail account
6. Enter the email address for your Pair Pro Mail box, and click Next
7. Enter the following information:
Username
This is the email address for the mailbox
Password
This is the mailbox password
POP Server
pop.pairpromail.com
8. Select Port 995
9. Check the box next to Always use a secure connection (SSL) when retrieving mail
10. Click Add Account
11. Select Yes, I want to be able to send mail as [custom email], and click Next
12. Enter the name you want to appear next to your address when you send email
13. Check the box next to Treat as Alias, and click Next Step
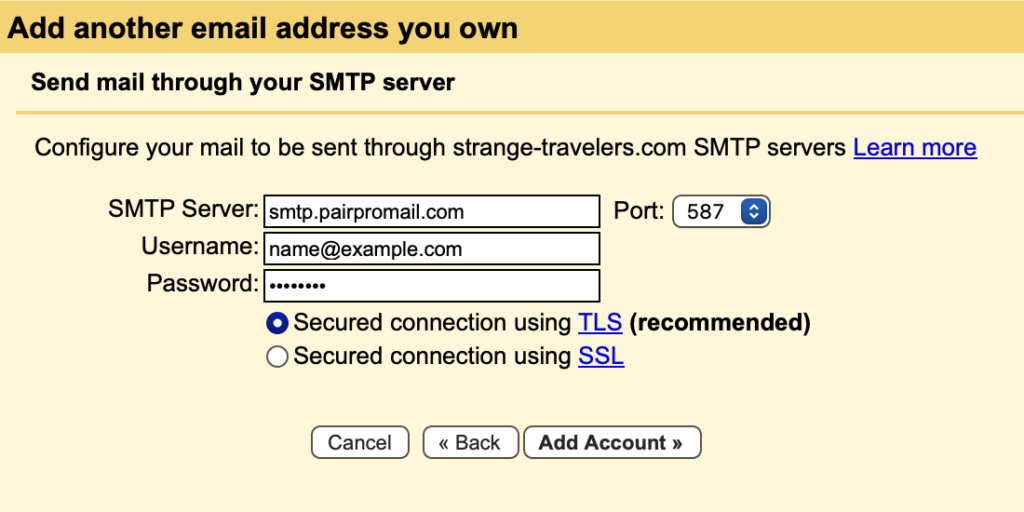
14. Enter the following information:
SMTP Server
smtp.pairpromail.com
Username
This is the email address for the mailbox
Password
This is the mailbox password
15. Select Port 465 or 587, and click Add Account
16. You will be asked to confirm your custom email address. To check your mailbox, log in to Webmail at pairpromail.com using your mailbox credentials. You should see a message with the subject Confirmation – Send Mail as [your email address]. The message has a confirmation code. Enter the code in the confirmation box at Gmail, and click Verify
After you create a mailbox, you can follow these steps to set it up in Mac Mail:
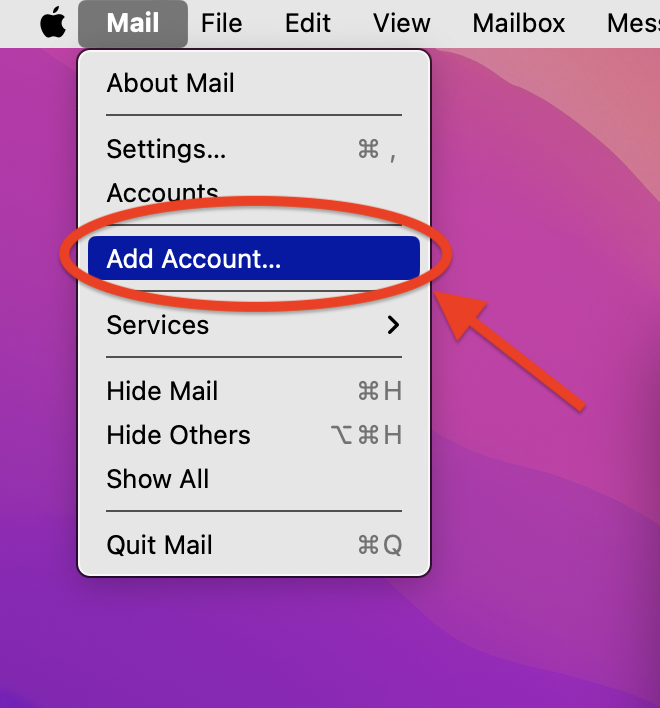
1. Open your Mac’s Mail app
2. In the top navigation bar, click Mail
3. Select Add Account from the drop-down
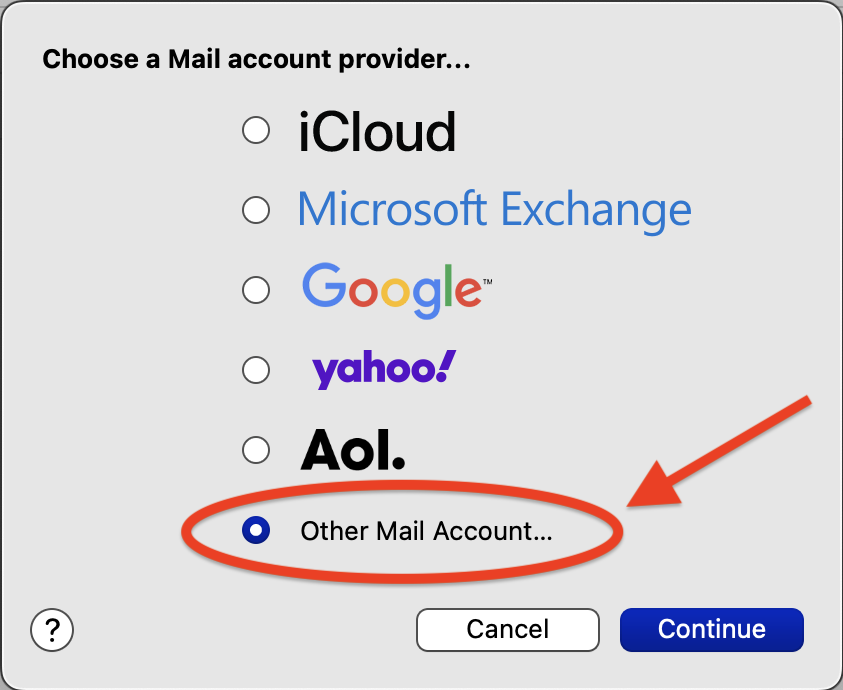
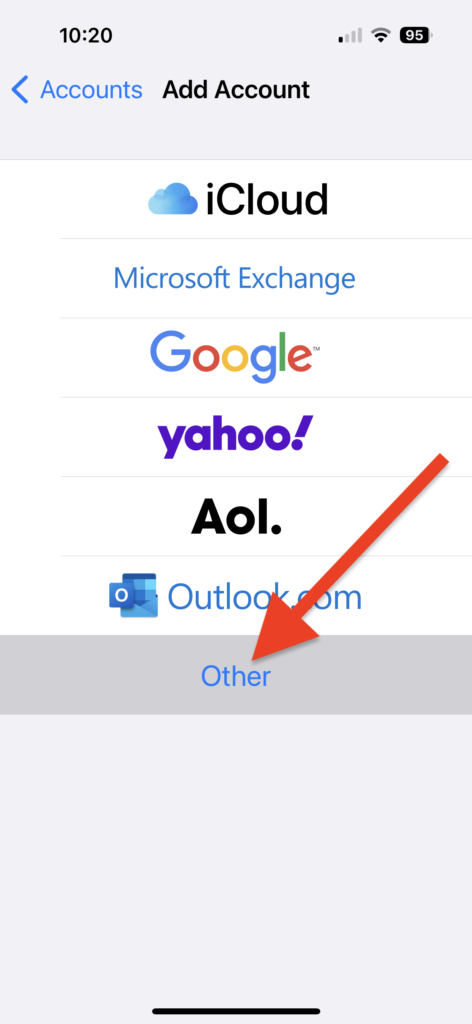
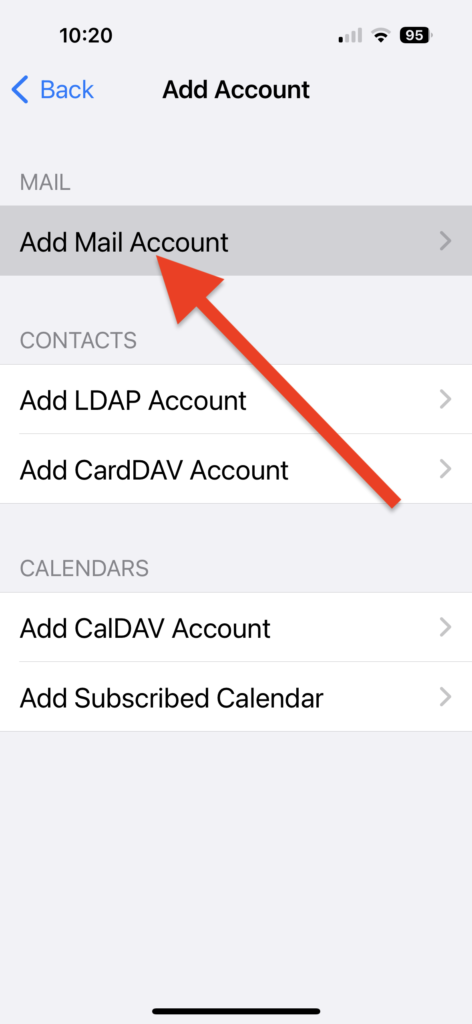
4. Select Other Mail Account, then click Continue
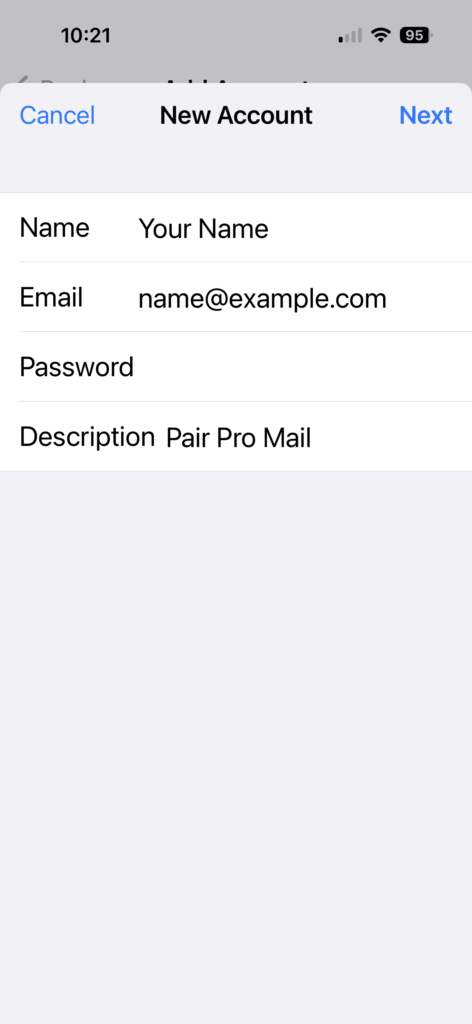
5. Enter the following information:
Name
This name will appear next to your address when you send email
Email Address
This is the email address for the mailbox
Password
This is the mailbox password
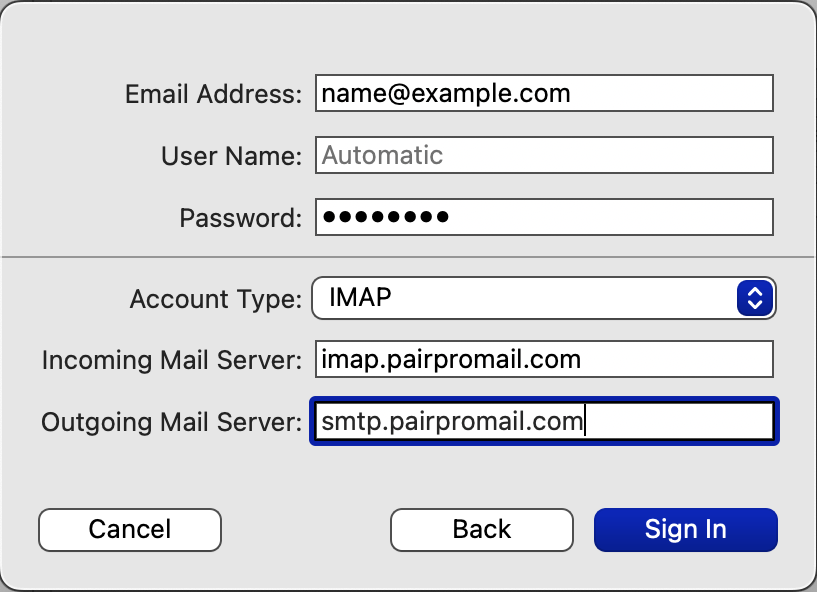
6. Click Sign In
7. Enter the following information:
User Name
This is the email address for the account
Account Type
Choose between IMAP or POP * IMAP: Email is stored on the server and synced between devices * POP: Email is stored on the device and not synced between devices For more information, check out: IMAP vs POP: Which Should You Use?
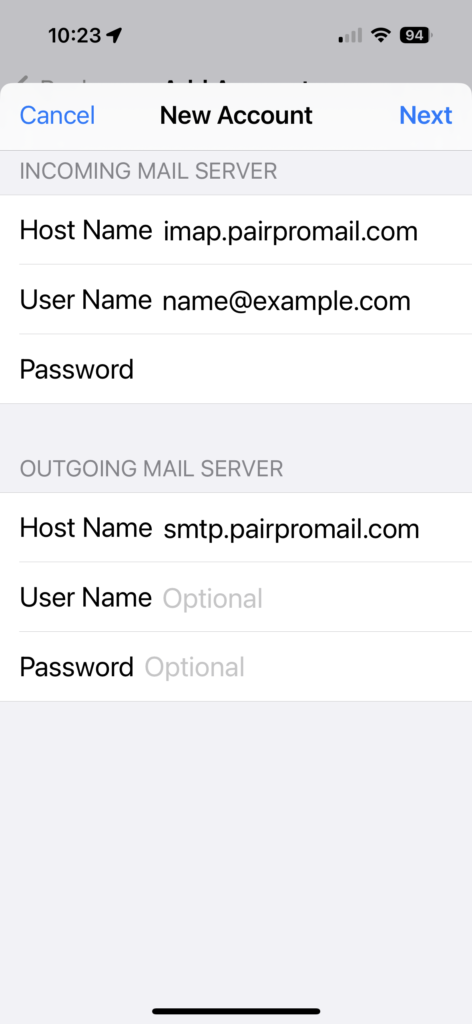
Incoming Mail Server
If you chose IMAP, use: imap.pairpromail.com If you chose POP, use: pop.pairpromail.com
Outgoing Mail Server
smtp.pairpromail.com
8. Click Sign In
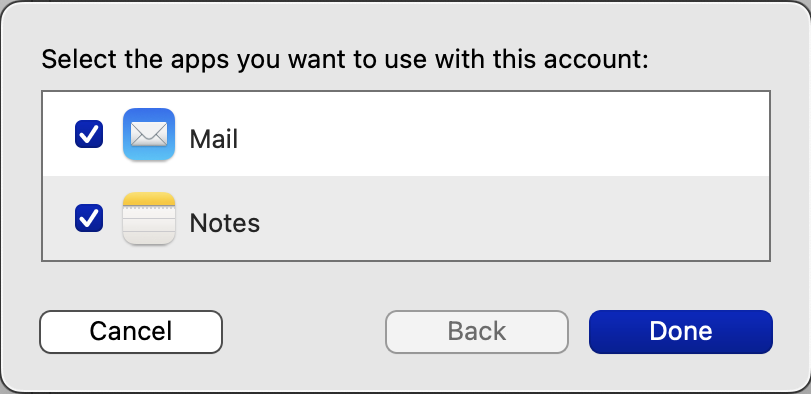
9. Select the apps you want to use with the account
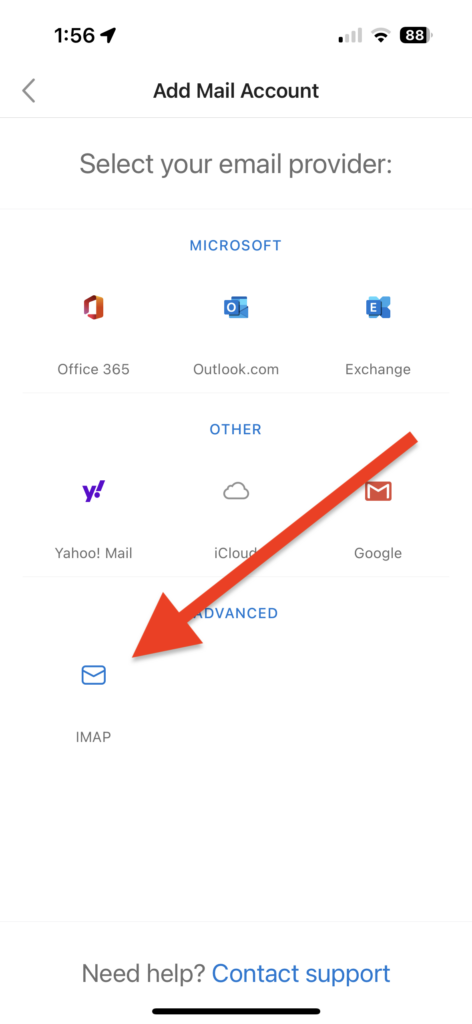
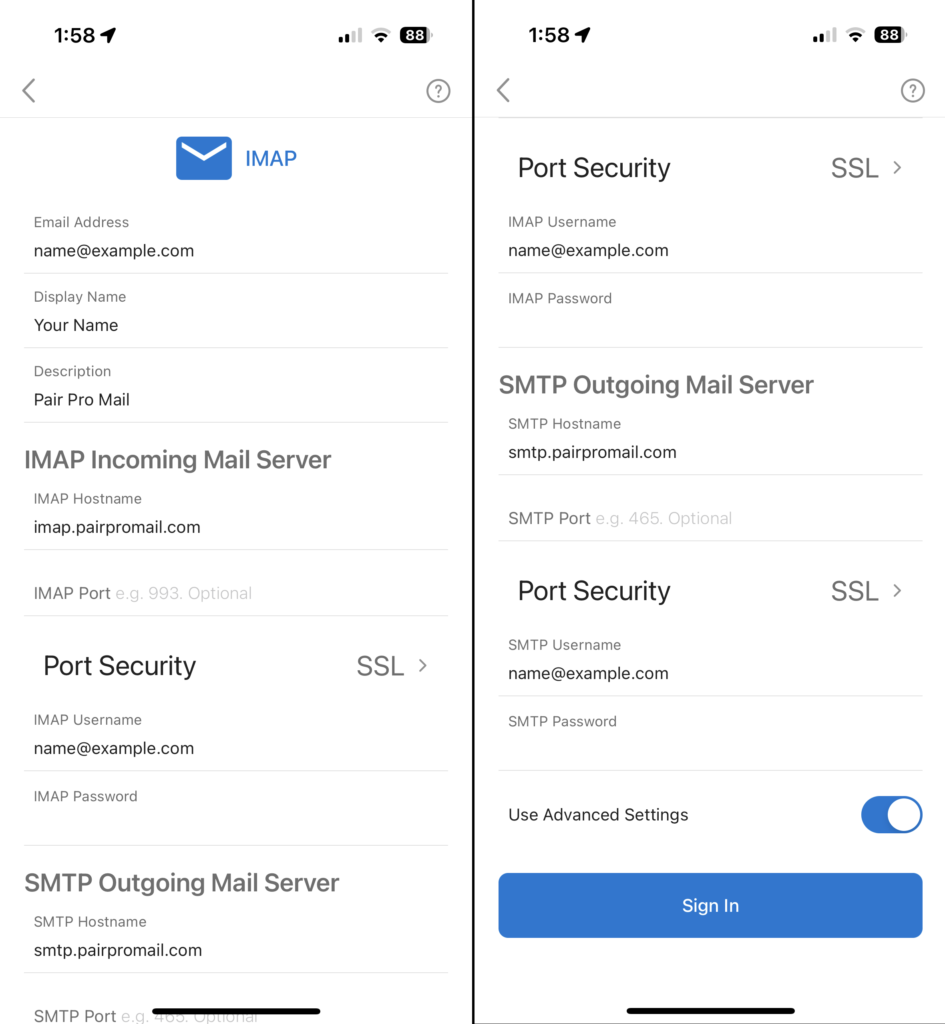
Please visit our Knowledge Base article Adding Pair Pro Mail to Your Domain for steps to add Pair Pro Mail. After you add it, you can set up an email client to access your mailbox, or you can use our Webmail page.
Incoming Mail Server / Hostname If you chose IMAP, use: imap.pairpromail.com If you chose POP, use: pop.pairpromail.com
Outgoing Mail Server / Hostname smtp.pairpromail.com
Ports These are the recommended ports for IMAP, POP, and SMTP: IMAP: 993 POP: 995 SMTP: 465 or 587
Note: Email clients sometimes incorrectly pre-populate email data. We recommend selecting your email client’s manual configuration option and entering your information manually.
Each domain using Pair Pro has a quota of 1 GB per mailbox. So a 1 mailbox plan has a quota of 1 GB, a 3 mailbox plan has a quota of 3 GB, and a 5 mailbox plan has a quota of 5 GB.
If the combined size of the mailboxes exceeds the quota, you be automatically upgraded to add an additional 5 GB of storage. Upgrades continue in 5 GB increments. The cost for a higher quota is $1 per month per 5 GB upgrade.
The upgrade cost will be charged on the last day of the month, and it is based on the quota used on that day.
If you need a small number of mailboxes on your domain, you can use Pair Mail Pro to add one, three, or five mailboxes. If you need more than five, we recommend using a Pair Networks web hosting account for email.
You can follow these steps to add Pair Pro Mail to a domain: